
Mastering the Centrifugal Metal Die Casting process requires focus on preparation, execution, and post-casting refinement. Precision ensures consistency, while attention to detail improves results. By perfecting these steps, you can achieve efficiency and superior product quality. Whether you work with Metal Aluminum Die Casting or create an Aluminium Die Cast, this process enhances every casting project.
Key Takeaways
- Getting ready is important. Pick good materials and make sure the mold is clean and warmed up to prevent mistakes.
- Watch the casting process carefully. Check the mold’s spinning speed and the hot metal’s heat level for steady results.
- Check your casting after it cools. Find any flaws and use finishing steps to improve strength and look.
Step 1: Preparation

Preparation is the foundation of mastering the Centrifugal Metal Die Casting process. By focusing on the right materials, mold preparation, and equipment setup, you can ensure a smooth and efficient casting experience.
Selecting the Right Materials
Choosing the correct material is critical. Metals like aluminum, bronze, and stainless steel are commonly used in the Centrifugal Metal Die Casting process. Each metal has unique properties, such as melting point and durability. You should match the material to the product’s intended use. For example:
- Aluminum is lightweight and corrosion-resistant.
- Bronze offers excellent wear resistance.
- Stainless steel provides strength and heat resistance.
Tip: Always verify the material’s compatibility with your mold and equipment to avoid defects.
Preparing and Preheating the Mold
A well-prepared mold ensures better casting results. Clean the mold thoroughly to remove debris or residue. Preheating the mold is equally important. It reduces thermal shock and helps the molten metal flow evenly. Use a temperature gauge to monitor the mold’s heat level. Consistent preheating minimizes the risk of cracks or imperfections in the final product.
Ensuring Proper Equipment Setup and Calibration
Your equipment must be in top condition. Inspect the spinning mechanism, heating elements, and safety features. Calibrate the equipment to match the specifications of the Centrifugal Metal Die Casting process. Regular maintenance prevents malfunctions and ensures consistent results.
Note: Double-check all settings before starting the casting process. Small errors in calibration can lead to significant defects.
Step 2: Execution
Once you’ve completed the preparation phase, it’s time to move on to the execution stage. This step involves understanding how centrifugal force works, pouring molten metal into the spinning mold, and monitoring the process to ensure consistency. Each action plays a vital role in achieving a flawless casting.
Understanding the Role of Centrifugal Force
Centrifugal force is the driving principle behind the Centrifugal Metal Die Casting process. When the mold spins, this force pushes the molten metal outward, ensuring it fills every cavity and detail of the mold. This creates a dense and uniform casting with minimal porosity.
To harness this force effectively, you need to control the mold’s rotational speed. Faster speeds increase the force, which is ideal for intricate designs. However, excessive speed can cause turbulence, leading to defects. Always refer to your equipment’s guidelines to determine the optimal speed for your project.
Tip: Conduct a test run with a small amount of molten metal to confirm the rotational speed is appropriate before proceeding with the full pour.
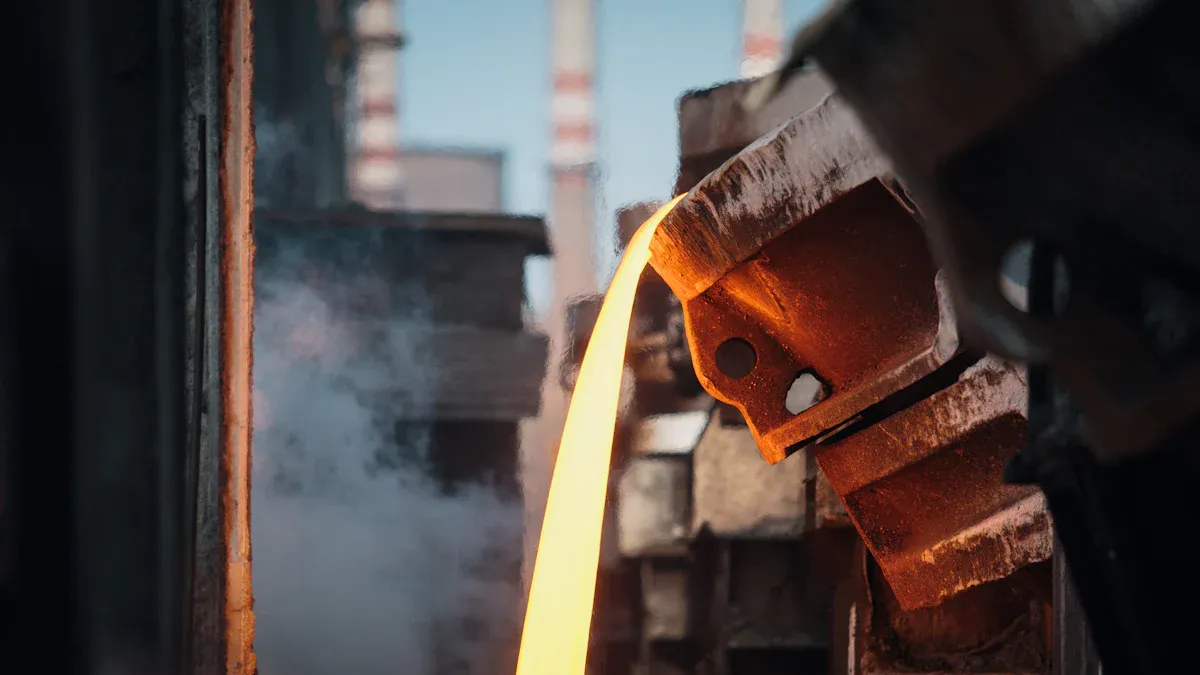
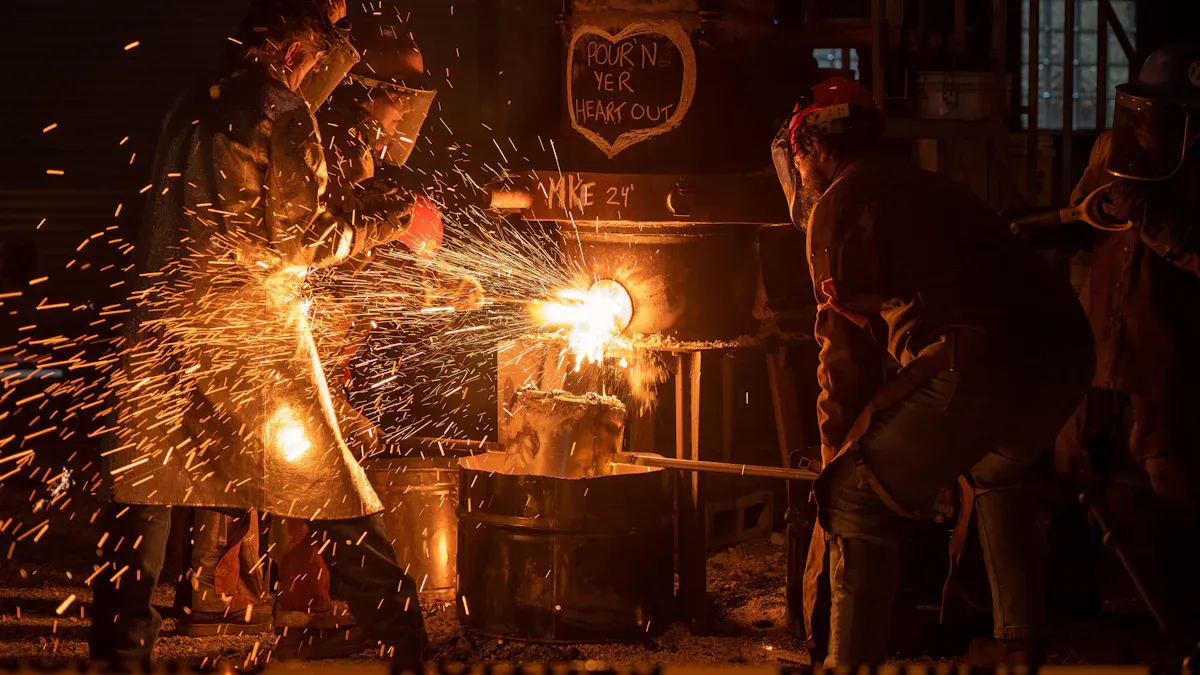
Pouring Molten Metal into the Spinning Mold
Pouring molten metal requires precision and steady hands. Begin by heating the metal to its recommended melting point. Use a ladle or pouring device to transfer the molten metal into the spinning mold. Pour slowly and steadily to prevent splashing or uneven distribution.
As the mold spins, the centrifugal force will distribute the metal evenly across its surface. Ensure the pouring process is continuous to avoid gaps or weak spots in the casting. If you’re working with a large mold, consider using automated pouring systems for better control and consistency.
Safety Note: Always wear protective gear, including heat-resistant gloves and goggles, when handling molten metal. This reduces the risk of burns or injuries.
Monitoring the Casting Process for Consistency
During the casting process, you must monitor several factors to ensure consistent results. Keep an eye on the mold’s rotational speed, as fluctuations can affect the quality of the casting. Use temperature sensors to track the molten metal’s heat levels, ensuring it remains within the optimal range.
Visual inspections are equally important. Look for signs of uneven metal flow or turbulence inside the mold. If you notice any irregularities, pause the process and make adjustments. Consistent monitoring helps you identify and address issues early, preventing defects in the final product.
Pro Tip: Maintain a log of your observations during the casting process. This record can help you refine your technique and improve future results.
Step 3: Post-Casting Refinement
Cooling and Solidification of the Casting
Cooling is a critical step in ensuring the durability of your casting. Once the molten metal fills the mold, allow it to cool naturally or use controlled cooling methods like air or water quenching. This solidification process strengthens the metal and prevents internal stress.
Tip: Avoid rushing the cooling process. Rapid cooling can cause cracks or distortions in the casting.
Monitor the temperature of the casting during this phase. Use a thermometer to ensure the metal cools evenly. Uneven cooling can lead to weak spots or structural flaws.
Removing the Casting from the Mold Safely
Once the casting solidifies, remove it carefully to avoid damage. Use tools like pliers or clamps to grip the casting securely. If the mold is reusable, handle it gently to preserve its integrity.
- Steps for Safe Removal:
- Confirm the casting has fully cooled.
- Loosen the mold’s locking mechanism.
- Extract the casting using steady, controlled movements.
Safety Note: Wear protective gloves and goggles during this step. Metal edges can be sharp, and residual heat may still be present.
Inspecting and Finishing the Final Product
Inspect the casting for defects like cracks, uneven surfaces, or air pockets. Use visual checks and tools like calipers to measure dimensions. If imperfections are present, refine the casting through grinding, polishing, or machining.
Pro Tip: Apply a finishing coat or treatment to enhance the product’s appearance and durability. This step adds value and ensures the casting meets industry standards.
Mastering the Centrifugal Metal Die Casting process involves preparation, execution, and post-casting refinement. Each step builds on the last, ensuring precision and efficiency. Focus on consistency and detail to improve your results. Apply these techniques to create durable, high-quality castings while optimizing your workflow. Success lies in your commitment to refining the process.
FAQ
What is the main advantage of centrifugal metal die casting?
Centrifugal casting creates dense, high-quality products with minimal porosity. The spinning mold ensures even metal distribution, making it ideal for precision parts.
How do you prevent defects during casting?
Ensure proper mold preparation, maintain consistent rotational speed, and monitor metal temperature. These steps reduce turbulence and improve casting quality.
Can beginners use centrifugal metal die casting?
Yes! Start with simple molds and practice controlling the process. Focus on preparation and monitoring to build confidence and improve your skills.
Tip: Experiment with small projects to learn the basics before tackling complex designs.
Post time: May-12-2025